It is tempting to post something sweet and chocolatey here - cakes get the most hits on any website, especially if they claim to be refined sugar free or good for you. There is definitely a place in everyone's life for a little cake, gluten free or not! However, living well gluten free involves baking and eating the sort of everyday food that sustains, nourishes and heals, as well as delighting our tastebuds. The holy grail of which is bread, no? How to make a loaf that rises, holds together when you slice it, has flavour and depth, a satisfying crumb and thin crust? How to make this mythical loaf without recourse to gums and stabilisers, starch, strange fats and added sugar? Since the gluten free bread available to buy in supermarkets is both full of rubbish and unpleasant to eat, the only solution is to make your own.
I love a deeply flavoured loaf and brown teff is the perfect flour for something with hints of malt loaf - without the sweetness - and a touch of Weetabix on the finish. It might be my desert island flour if I had to choose one. When fermented, teff has a particularly sour quality that is perfectly balanced by the sweet nutty flavour of chestnut flour. Because I use both sweet rice flour and chia seed, the loaf has a very slightly chewy crumb with a great structure that is wonderful toasted straight from the freezer, or as bakers perk spread thickly with butter as soon as the loaf has cooled and settled. All of the flours are available from Shipton Mill.
If you check the information sheets tab on the sidebar, I give instructions for making a sourdough starter. If you want to make the loaf without a sourdough starter, just follow instructions for making it with yogurt and yeast instead of starter.
Before you start baking, you will need to activate your starter. It will need several hours to properly wake up if it has been in the fridge so to make sure it is nice and vigorous, you can feed it the night before you plan to bake and then feed it again as soon as you wake up. I generally keep about 350ml of starter as a reservoir, so each time I bake I feed 150g with 300g flour and 400g water the night before (discarding any excess old starter that isn't used), a then make a leaven the next morning to get the yeastiest results - although you could just use the starter as it is the next morning. Put any freshly fed starter and also leaven back in the fridge when you have finished using it. You can use the excess (called 'discard') for making pancakes, crumpets etc or throw it away. See my downloadable starter instructions for this.
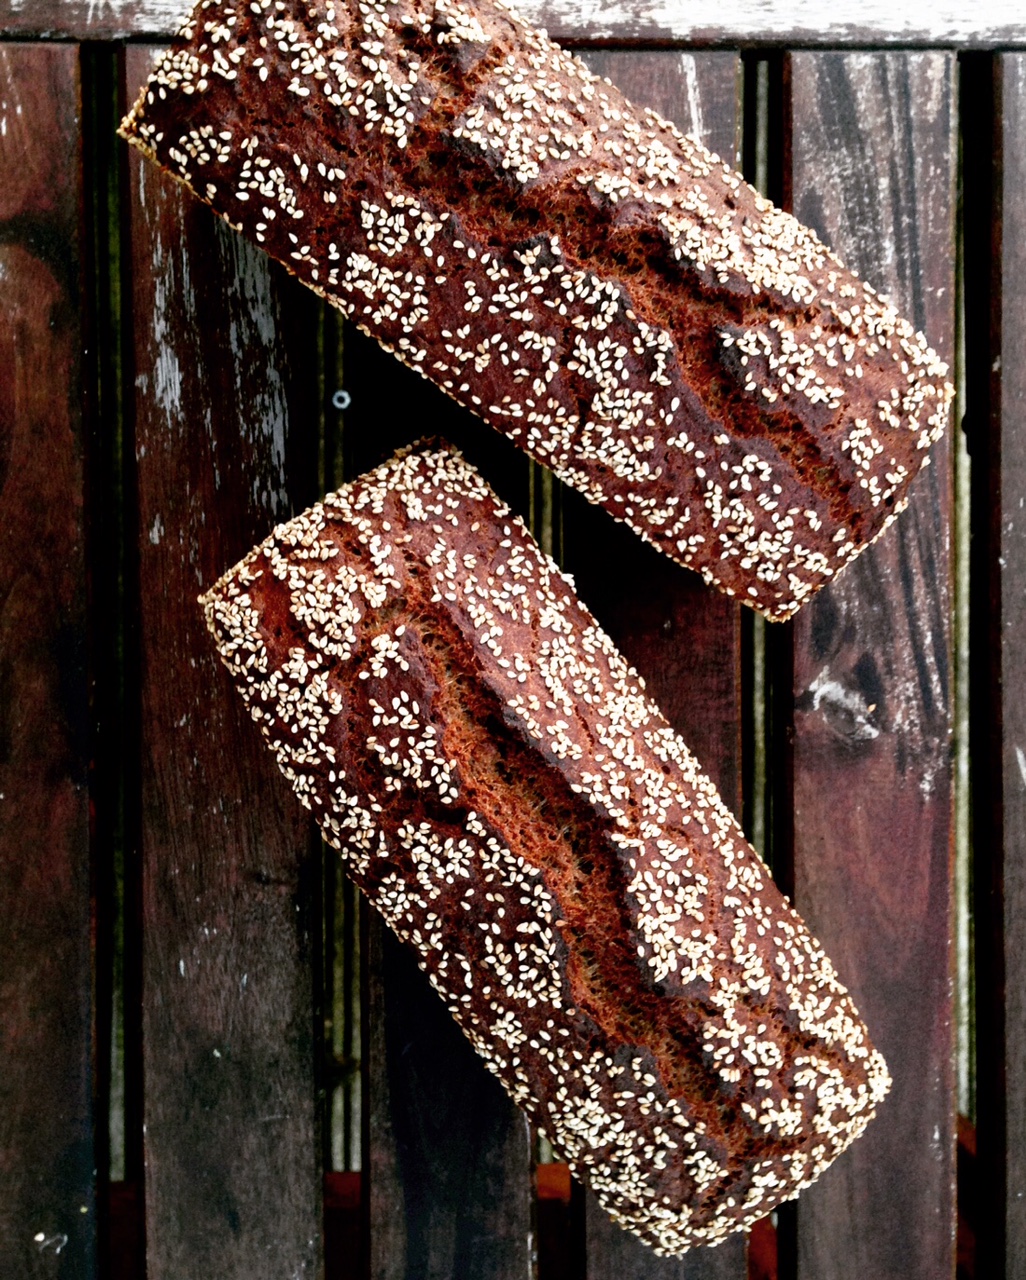
Malty sourdough with pumpkin & chia seeds
150g chestnut flour
100g brown teff flour
100g tapioca starch
50g sweet rice flour or buckwheat flour
50g buckwheat flour
8g fine sea salt
10g chia seeds (or golden linseed)
2 1/2 tsp ground psyllium husk
200g active gluten free sourdough starter or leaven (or 90g live yogurt + 110g buckwheat flour + 1 tsp (5g) quick dried yeast)
1 tsp blackstrap molasses (optional)
40g pumpkin seeds
butter/lard/coconut oil to grease tins & sesame or sunflower seeds to coat
a 2 lb loaf tin - approx dimensions 25cm x 11cm x 8 cm (I use Vogue brand)
Whisk together the chestnut flour, brown teff flour, tapioca starch, sweet rice flour, buckwheat flour, salt, chia seeds and psyllium husk. Add the sourdough starter (or yogurt + flour + yeast), molasses and 400g tepid unchlorinated water and beat until smooth. Use your hands to squish the mixture until all the lumps have gone and the mixture starts to feel more like a soft sticky dough. You can put it in a stand mixer to do this too if you like. If the mixture still feels too wet, sprinkle over another 1/2 teaspoon of psyllium husk and beat/knead until it becomes firmer, do this again if it’s still not right and adjust your measurements for next time - psyllium husk can vary. knead the pumpkin seeds into the dough.
Oil a mixing bowl and scrape the mixture into it, cover and leave for an hour at room temperature - if you have a proving drawer, set this at 30ºC and prove for 45 minutes.
Line a 2 lb (900g) loaf tin with baking parchment or butter the inside and coat with sesame seeds or gf flour. Tip the dough out onto an oiled surface and fold one side into the centre, pinch and fold the other side over the top of it, pinch the end over and flip the dough over into the tin so that the smooth, oily side is uppermost. Sprinkle with sesame, sunflower or pumpkin seeds and put in a warm place for about 3-5 hours until the loaf has risen up to the top of the tin. Don't let it come over the top of your tin as it will flow down the sides!
15-20 minutes before the rise time is up, heat the oven to 240ºC conventional heat - not the fan setting. Put a baking tray in the bottom of the oven and boil the kettle.
Very gently ease the loaf tin into the oven – if you tap or bang it at this stage it can collapse, as there is no gluten in the mixture to hold the bubbles in. Straight away, pour a mug of boiling water into the tray in the bottom of the oven - watch you don't burn your face with the steam! Bake for 30 minutes and then turn the oven down to 200ºC and switch to fan setting for another 25 minutes.
If the loaf looks too dark at any point put some tin foil over the top to stop it burning – the crust will be fairly dark on this loaf anyway, so don’t be alarmed.
After 55 minutes in total take the loaf out of the oven – it should have a firm crust all round and sound hollow-ish when tapped on top. Leave in the tin for a few minutes, then lift out the loaf and bounce your fingers on the side to see if it seems firmish. If not, just put it back in the oven without the tin at 180ºC for another 10 minutes to continue cooking.
Cool on a rack and do not cut until completely cold. Slice and freeze anything that won’t be eaten within 24 hours.


